
MapLab Pro — Documentation
A professional location map and directory component for Joomla 5 and 6.
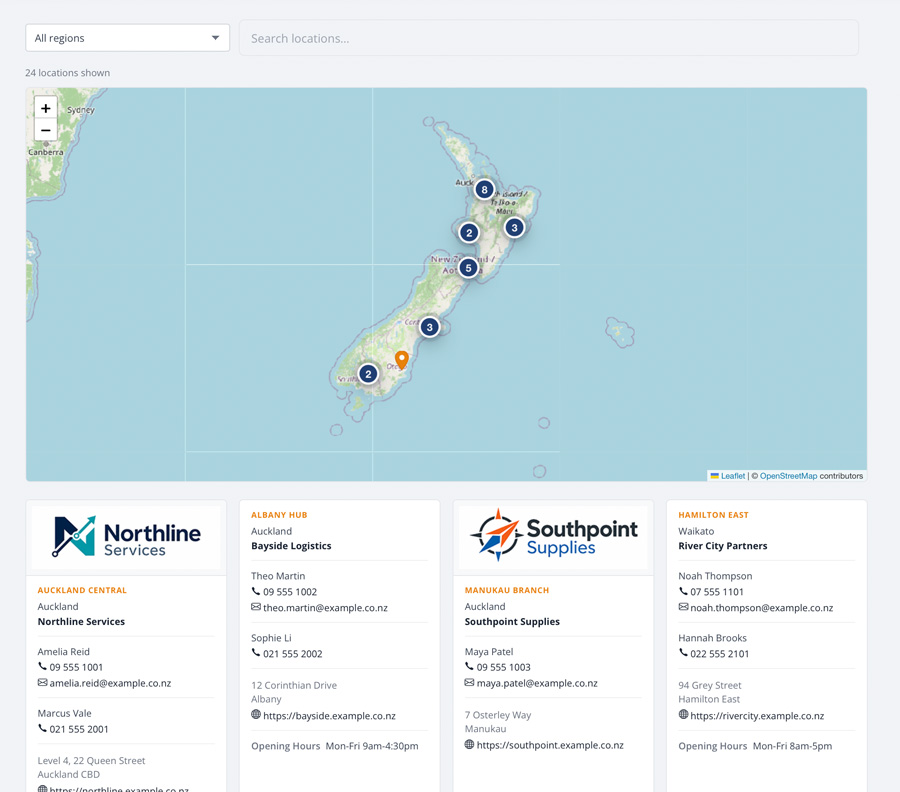
MapLab Pro lets you create searchable, filterable location maps with custom location fields, region filtering, marker clustering, CSV import/export, address/place search, multiple territory markers per location, card grids, marker styling, SEO-friendly location pages, and a Joomla-native administrator workflow. It is designed for dealer networks, branches, service centres, stockists, offices, territories, venues, and any site that needs a polished “find a location” experience.
Requirements
- Joomla 5.x or 6.x
- PHP 8.1+
- MySQL 5.7+ or MariaDB 10.3+
MapLab Pro Tutorial Video
Installation
- Download the latest release from extensions.thedesigncompany.co.nz.
- In your Joomla administrator, go to System > Install > Extensions.
- Upload the
pkg_maplabpro_v*.zippackage and click Upload & Install. - MapLab Pro appears in the administrator sidebar under Components > MapLab Pro.
- Create a map, add regions, then add or import locations.
Getting Started
Creating Your First Map
- Go to Components > MapLab Pro > Maps and click New.
- Enter a Title for your map, such as Branches, Stockists, Dealers, or Service Centres.
- Add an optional description for internal reference.
- Set the status to Published.
- Click Save.
Adding Regions
Regions are the public filter groups for a map. They are scoped to one map, so duplicated maps can have their own region sets.
- Go to Components > MapLab Pro > Regions.
- Click New.
- Select the Map this region belongs to.
- Enter the region title, such as Auckland, Canterbury, or North Island.
- Set marker colour or ordering if required.
- Click Save & New to continue adding regions.
The Regions list includes a map filter and a map column, making it easier to manage duplicated maps.
Configuring Location Fields
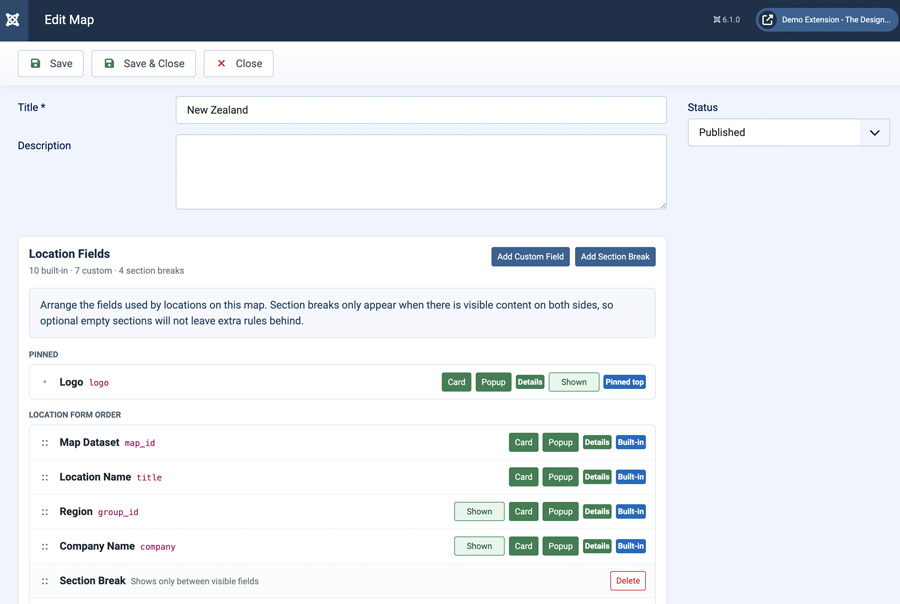
Each map controls its own location field layout from the map edit page.
- Open Components > MapLab Pro > Maps.
- Click the map title.
- Use Location Fields to arrange built-in and custom fields.
- Drag fields into the order locations should use.
- Add custom fields when the map needs extra data.
- Add section breaks to separate groups of visible fields.
- Hide optional built-in fields that do not apply.
- Save the map.
The logo field stays pinned at the top of the layout. It can be hidden, but it is not draggable.
Adding Locations
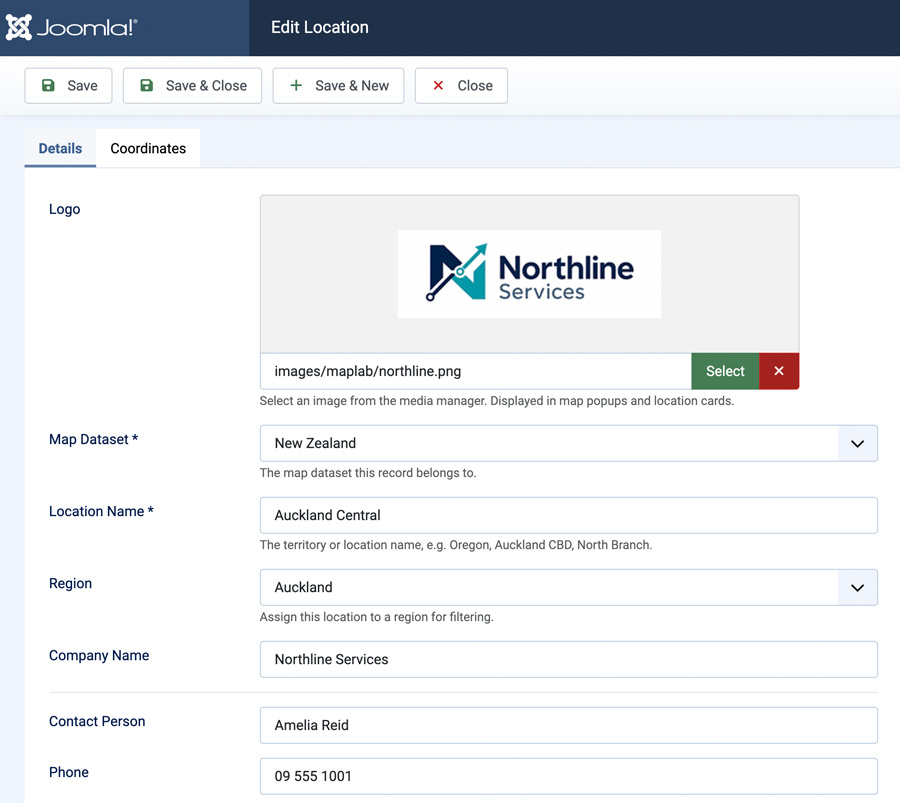
- Go to Components > MapLab Pro > Locations and click New.
- Select the Map Dataset.
- Enter the Location Name.
- Assign a Region if required.
- Add contact details, address, logo, website, and any custom field values.
- Search for an address/place or enter the destination address manually.
- Enter or confirm latitude and longitude. Coordinate pairs can be pasted into either coordinate field.
- Add additional markers when the same parent location needs territory or branch pins.
- Set the status to Published.
- Click Save & New or Save & Close.
Creating a Menu Item
- Go to Menus and edit the menu where you want the map to appear.
- Click New to add a menu item.
- Set the Menu Item Type to MapLab Pro > Map.
- Select the map dataset.
- Configure display, filtering, behaviour, and clustering options.
- Save the menu item.
Using The Module
MapLab Pro also includes a module for placing a map in any module position.
- Go to System > Site Modules.
- Click New and choose MapLab Pro Map.
- Select the map dataset.
- Configure map height, cards, filtering, clustering, and marker options.
- Assign the module to the required menu items.
- Save and publish the module.
Key Workflows
Maps, Regions, And Locations
Maps are separate datasets. Regions are scoped to maps and provide frontend filtering. Locations are the parent business, office, agent, or dealer records. Markers are the visible pins. A location has a primary marker and can also have additional territory or branch markers. Only published locations and published markers with valid coordinates appear on the map.
Address And Destination Links
The location editor separates destination address data from marker position. Address/place search can populate formatted address, Google Place ID, and address coordinates when a Google Maps API key is configured. Manual address and manual coordinates remain available when Google integration is not configured.
Google Maps links prefer the parent destination in this order: Place ID, formatted address, address coordinates, then marker coordinates. This allows a marker to sit in a territory while its address/directions link still opens the real business or head-office location.
Additional Markers
Additional markers can inherit the parent contact details or use marker-specific contact person, email, phone, and notes. Each marker can also use the parent location region or a specific Marker Region for frontend filtering.
Location Fields
MapLab Pro combines built-in and custom fields into one ordered field layout per map. Optional built-in fields can be hidden, custom fields can be copied to another map, labels can be hidden, and section breaks can be used to separate visible groups of fields.
CSV Import And Export
The CSV importer supports Append, Update existing, and Replace all modes. It can create missing regions and custom fields, preview mapped columns, and warn about duplicate headers, ignored columns, missing titles, empty rows, invalid emails, invalid URLs, and invalid coordinates.
title,group,lat,lng,company,contact,phone,email,address,website,logo
Use Export CSV from the Locations list. Select a single map before exporting when custom field columns should be included. CSV import/export manages parent location records; additional marker records are edited from the parent location form.
Frontend Display
The frontend can show a map, search field, region dropdown or buttons, optional custom field filters, marker clusters, popups, and a card grid. Cards and popups follow the same field order configured on the map. Additional marker cards appear alongside parent location cards and sort alphabetically by the displayed territory/location label.
SEO And Location Pages
Individual location pages provide SEO-friendly detail views and structured data where enough location information is available.
Data Health
Go to Components > MapLab Pro > Data Health after large imports, map duplication, map deletion, upgrades, or manual cleanup. Repairable issues can be fixed from the Data Health screen.
Settings Reference
Map Source
- Map Dataset — selects the map to display.
Display
- Map Height — controls the Leaflet map height.
- Tile Provider — OpenStreetMap, Carto light/dark, Google, or Google satellite.
- Marker Colour — default marker colour.
- Marker Size — small, medium, or large.
- Show Cards — show or hide the card grid.
- Cards Per Row — desktop card column count.
- Maximum Logo Height — caps displayed logo height.
- Show Directions — show or hide directions links.
Filtering
- Default Region — optionally preselects a region.
- Region Filter Mode — dropdown, buttons, or hidden.
- Show Legend — displays region colour legend when enabled.
- Show Search — displays the search input.
- Show Field Filters — displays custom field filters.
Map Behaviour
- Auto Fit On Load — fit the map to visible markers on load.
- Auto Fit On Filter — refit the map when filters change.
- Initial Latitude / Longitude — optional starting centre.
- Initial Zoom — starting zoom level.
- Minimum Zoom / Maximum Zoom — zoom bounds.
Clustering
- Enable Marker Clustering — groups nearby markers.
- Cluster Radius — controls how aggressively markers cluster.
Troubleshooting
Locations do not appear
Check that the map, location, and marker are published, coordinates are valid, the frontend view points to the correct map, and filters are not hiding the location.
Additional markers filter under the wrong region
Open the parent location and check the marker’s Marker Region. Use Parent Region follows the parent region; choosing a specific region makes that marker appear only when that region is selected.
CSV columns are ignored
Columns are ignored when they do not match a built-in field or a custom field for the selected map. Enable Create missing custom fields if those columns should become fields.
A CSV import creates no locations
Check that the CSV has a title or location name column. Rows without a location name are skipped unless update mode can match them by ID.
Marker clusters are too broad or too tight
Adjust Cluster Radius in the menu item or module settings.
Support
The Design Company
extensions.thedesigncompany.co.nz